I have created an Oracle VM with Windows Server 2012 R2 64-bit as part of my installation of CRM 2013.
Listing down the steps that I have followed:
- Download Oracle VM software from the link: Oracle VM download link
- Since I have Windows 10 installed on my machine, I have downloaded the 64 bit version of software for Windows platform.
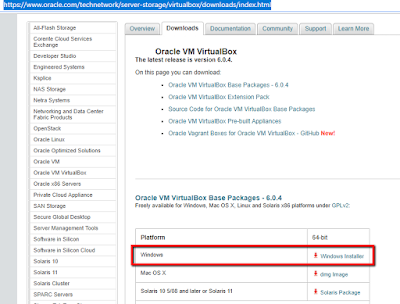 |
| Oracle VM virtual box download page |
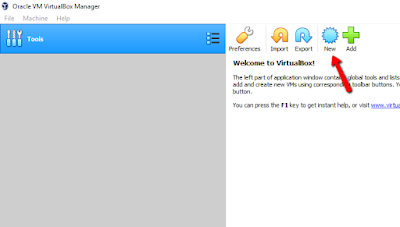 |
| Creating new Virtual machine in Oracle VM |
- Provide necessary details and click on Create button. Select the option to create a virtual hard disk so that a vhd is created for you.
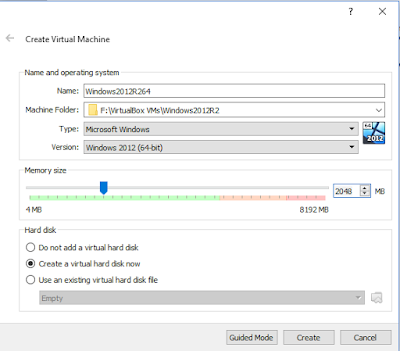 |
Creation of VM - basic settings
|
- Provide necessary details for creating a virtual hard disk. I recommend to allocate 60GB or more as the applications for CRM 2013 would require a lot of space. Select the Virtual hard disk option and also select the option to allocate storage space dynamically. Dynamic allocation of storage space is helpful in case you need to increase the storage space in the future.
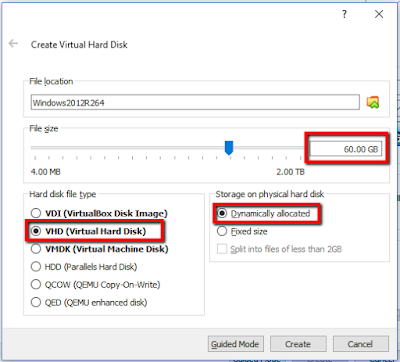 |
| Creation of VHD file - settings |
- Once the VM is created, select the VM in Oracle VM interface and click on Start.
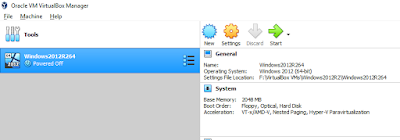 |
Starting the created VM
|
- The user will be prompted to select a start up disk. Select the iso file for Windows Server 2012 R2.
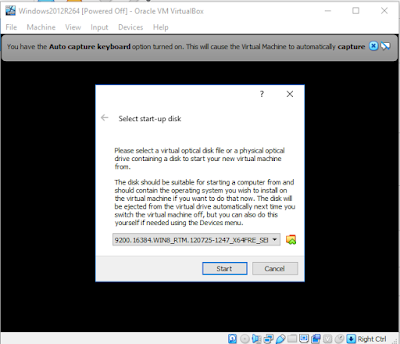 |
| Selection of start-up disk |
- Follow the installation steps to install Windows. I have selected the option to install server with GUI as I am more comfortable with GUI.
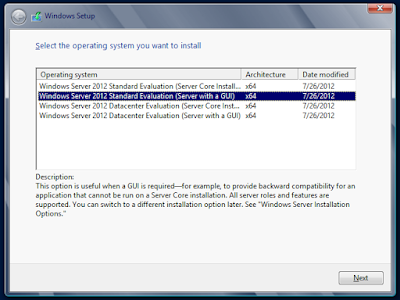 |
| Selected option with GUI |
This completes the installation of Windows Server. 👍
The next step is to enable sharing of folder between the host OS and the VM. This helps in copying files between the host OS and VM.
Here are the steps:
- Under Devices menu click on "Insert Guest additions CD image"
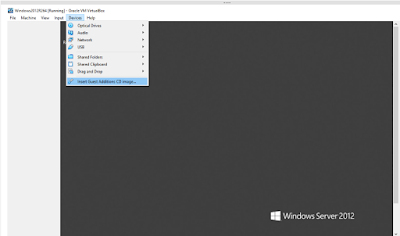 |
| Insert Guest addtions CD image |
- This mounts the Guest additions CD image. Navigate to "Computer" you should be able to see the Guest additions image mounted.
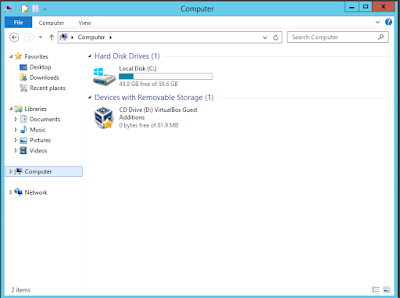 |
| Guest additions CD mounted |
- Open the drive and run VBox Windows Additions file.
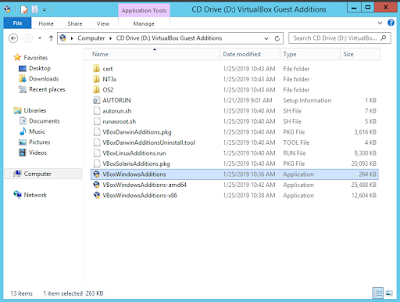 |
| Running Guest additions installer |
- Follow the wizard to install Guest additions on the VM. Allow the VM to reboot once the installation is complete.
- Its now time to configure a shared folder so that files can shared between the host OS and VM.
- Under Devices menu, select Shared folder settings.
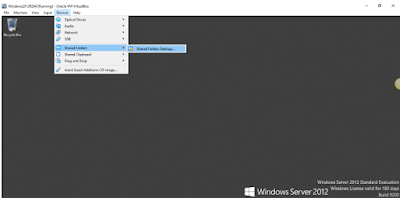 |
| Shared folder settings |
- Select "Machine Folders" and click on the Add sign.
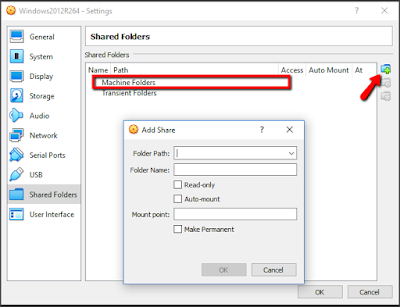 |
| Adding a machine folder |
- The folder path text box lists out the folder structure on the host machine. Select one folder which you want to share with the VM.
- Check the Auto mount checkbox to enable mounting of the shared folder every time the VM is started.
- Check the "Make permanent" check box in case you want to save the setting permanently.
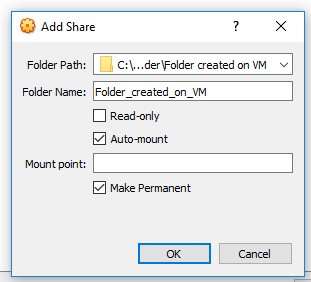 |
| Settings for shared folder |


No comments:
Post a Comment